Introduction
Recent advancements in LLMs have transformed how programmers search for help on their coding. By integrating AI into their workflows, users can now access contextually relevant answers to their questions which helps accelerate learning for beginner students and enhances productivity for experienced researchers by spending less time on the coding and more on the data analysis.
Integrating OpenAI’s ChatGPT into RStudio is now possible with “Chattr”, “GPT Studio” and “GitHub Copilot”. These new tools will help you find the right functions and commands and to quickly generate code snippets to save you time.
The contextual relevance is achieved by the AI tool using the project’s existing code (such as comments) and using existing chat history as ‘prompts’ that instructs the AI on the response that should be generated.
“Chattr” and “GPT Studio” are opensource packages that run within RStudio as RShiny apps. They require an API Key from OpenAI which you can obtain here and your OpenAI account will also need to be in credit, with the costs currently standing at 3 pence per thousand tokens (the chunks of text that an input and output is divided into), and gpt-4 needs to be enabled in the “Project Limit” settings of your OpenAI account.
GitHub Copilot does not require an API key and is free to staff and students but you’ll need a GitHub account with Copilot activated with the free education license. Log into your GitHub account and click the “Join GitHub Education” button, select “University of Manchester”. Next, go to your GitHub settings and select “Copilot”. Make sure to click on “Get access to GitHub Copilot” button. You will need to wait a few days before your Copilot becomes activated.

The chattr package works inside RStudio and RStudio Cloud and can be installed by clicking on “Tools” > “Install Packages” from the RStudio menu and entering “chattr” in the Packages textfield as shown below.
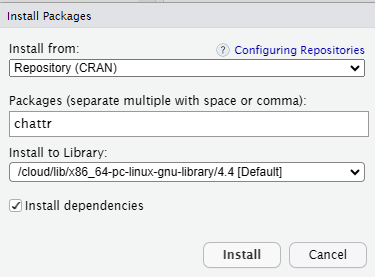
Click the Install button and when it has finished enter the commands below in the RStudio command window. Make sure to replace “YOUR-API-KEY" with your OpenAI key.
- library(chattr)
- Sys.setenv("OPENAI_API_KEY" = "YOUR-API-KEY")
- chattr_use("gpt4")
- chattr_app(as_job = TRUE)
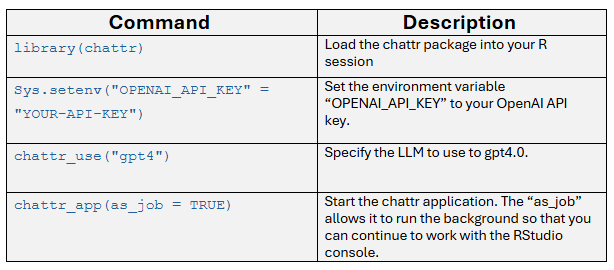
Chattr will automatically appear in the Viewer tab at the bottom-right pane and you can now chat interactively; for example we can ask it to generate a script to calculate a person’s age.
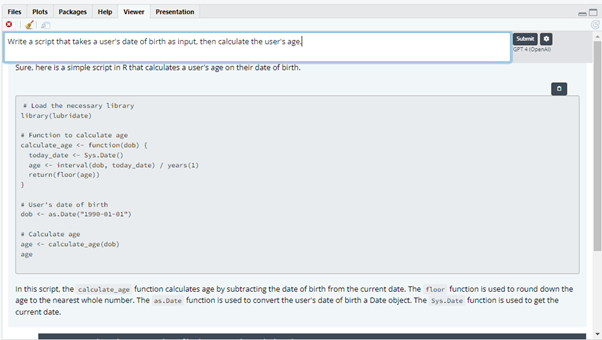
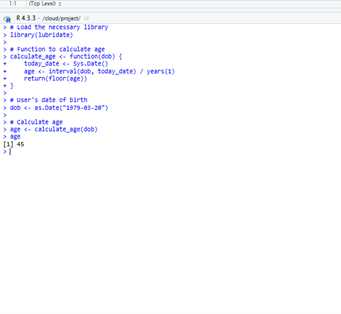
As you can see chattr conveniently provides comments and a description of the code generated which can be copied and pasted into your script and run.
You can even ask it general questions such as “what datasets are available that show global temperature over time”.
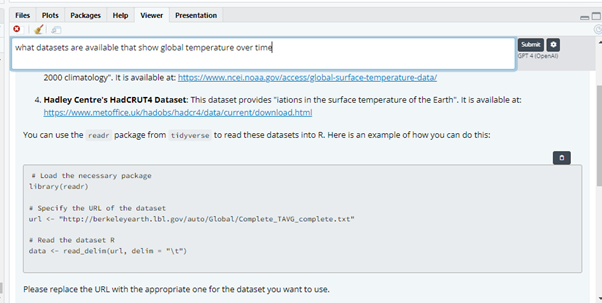
In this case the URL was out of date and therefore needed to be corrected.
This is a reminder to beware that AI models are still prone to producing inaccurate output and should never be completely relied upon in your projects.

Gptstudio is another open source R Shiny App that is slightly more customisable than chattr. In its settings, it can be set to use a wider range of LLMs including Llama and Claude. In this example we’ll continue to use gpt-4.
GptStudio is currently not compatible with RStudio Cloud but works fine on your local computer with R versions 4 and above.
Run the following commands to install the gptstudio package in RStudio making sure to replace “YOUR-API-KEY" with your OpenAI key.
- install.packages("gptstudio")
- Sys.setenv("OPENAI_API_KEY" = "YOUR-API-KEY")

To start gptstudio select from the RStudio menubar “Tools” > “Addins “> “gptstudio “> “Chat”.
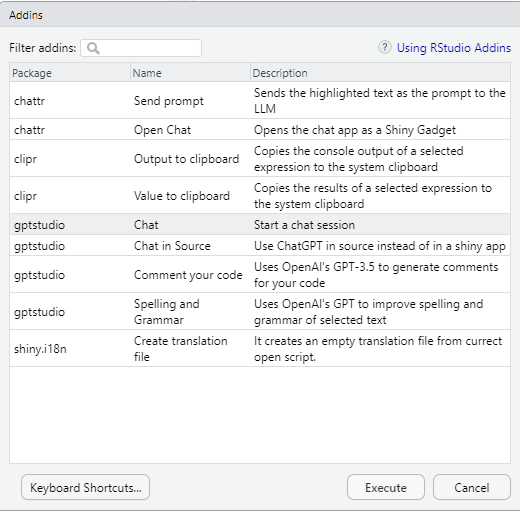
The interactive chat window will now appear where you will need to open gptstudio’s options panel (click on ‘>’) and select “gpt-4” as the chat model to use in the API Service settings. Press the save button before continuing.
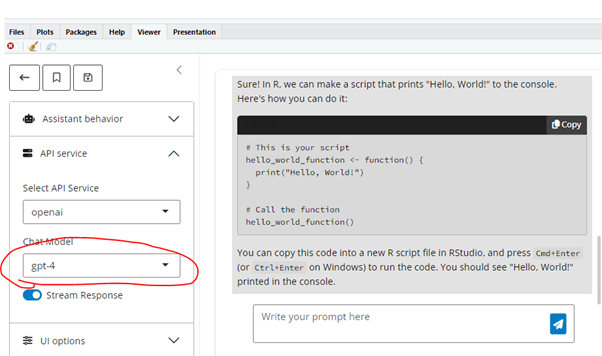
The “Assistant behavior” settings can be customised to cater for different skill levels and you can also add custom default prompts (such as ‘provide code with detailed explanations’). In this article, we’ll keep to the defaults.
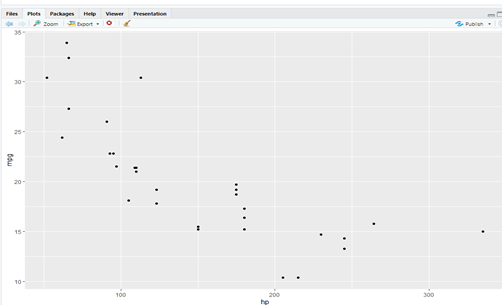
Next we’ll ask the LLM the question “load the mtcars dataset and plot it in a graph”.
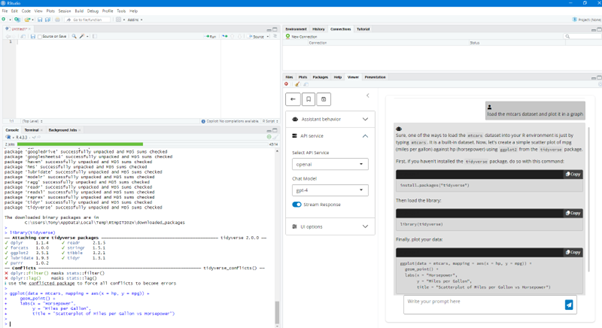
The AI has automatically generated code that selects ‘horsepower’ and ‘miles per gallon’ from the dataset and successfully plotted the results into a scatter graph, thus demonstrating the time that can be saved compared to coding the graph manually without AI assistance.

GitHub Copilot is a code completion assistant rather than a conversational chat interface. It is available in RStudio versions 2023.09.0 and above without needing to install separately. There is no API code required and is completely free to members of the university, but it is still necessary to have a GitHub account with copilot enabled. There is a special registration process that ensures you can use it for free described here.
It is used within RStudio’s Script Editor (the top left window pane) only and it suggests contextually relevant code automatically on the fly.
To enable Copilot in RStudio click on “Tools” > “Global Options” > “Copilot” on the menu bar and tick the Enable GitHub Copilot box.
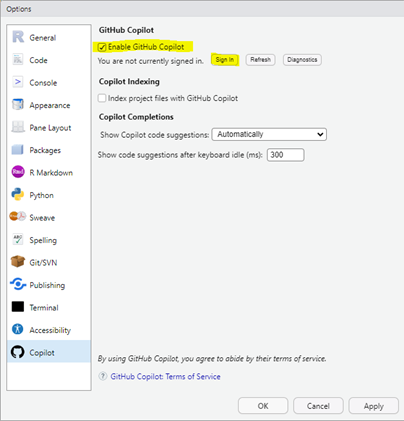
It will ask to install an extension after which you’ll need to sign in with your github account (which must have copilot activated) and you will need to authorise the plugin by following the instructions that will appear on screen. If you are using RStudio Cloud you’ll need to authorise the plugin for each new project that you create, but if you are using a locally installed RStudio on your computer, this authorisation process only needs to be done once.
The way GitHub Copilot provides contextually relevant suggestions is by looking at your existing code and comments which act as prompts.
Code suggestions automatically appear in the colour grey and you press the “Tab” key to accept the suggestions and the enter key to ignore.
You can check the Copilot status to see if it is generating suggestions in the background from the status bar circled in red below.
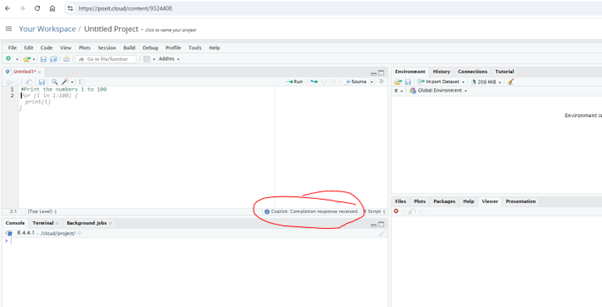
In the above example, Copilot has read the comment about printing numbers from 1 to 100 and suggested the relevant code in grey. Pressing the Tab button inserts the suggested code into the script which can be run.
Get in Touch
To get in contact with any info or questions, feel free to contact the R User Group (R.U.M) on its Teams Channel.
Acknowledgements
This article is inspired by Dr. Kamilla Kopec-Harding’s talk, ‘Getting Started with Deep Learning in R,’ recently presented at the R User Group. Special thanks to Rowan Green for sharing talk notes.

